Gaining access to our kids' ItsLearning Skoleintra calendar
Preface / intro #
The challenges of scraping cloudflare protected sites and how simple is often times better.
At our childs school they use the Skoleintra / Forældreintra platform as an intranet to facility communication between school and parents. They host the weekly schedule, monthly calendars, school plans and more and expect parents to stay updated by traversing all their updates on that platform.
We wanted to simplify things for ourselves, and since we already consolidate our own calendar in our smarthome dashboard, we wanted to also show the kids' school calendar. And how smart is a smarthome dashboard really, if it can't have access to even more data?
So the challenge here was - integrate the Skoleintra calendar and weekly schedule, to allow the whole family to swiftly check important detail without needing to access their website.
Turns out this wasn't as easy as first expectected, and the Skoleintra domain is Cloudflare protected. Which means I kept facing HTTP 500 error after scraping for a while. Sometimes on the first attempt, sometimes after several attempts. This post details the long journey of various attempts to work around it, and how I finally settled on what is arguably not the best user experience but still very much in line with the rest of the dashboard experience.
This post is kept intentionally vague on the basis that it touches upon topics like web crawling and https sniffing. I am sure however, that the reader can fill in any blanks on their own as needed. All references to the actual school subdomain has been changed to "https://example.m....".
First approach: GET / POST request #
Using Axios to authenticate and navigate pages.
Let’s first see what we get from a get response to the main site.
GET https://example.m.skoleintra.dk/
Using the Axios package we can write out a simple script like below and save it as a new .js file. Here we send a HTTP GET request to the provided URL and print out the body of that response. We will also print some debugging information to console In case of any errors.
// SkoleIntra.js
import axios from 'axios';

const client = axios.create({});

try {
    const getResponse = await client.get('https://example.m.skoleintra.dk');
    console.log(getResponse.data);
} catch (e) {
    console.error(e.code, e.response?.status, e.response?.statusText);
}
Executing the script:
> node SkoleIntra.js

Oh no!
The server responds with a 500 internal error. I went ahead and opened the same URL with Firefox which showed the page loading succesfully without any errors as expected. Let’s print a few more details about the error and see what else we can learn about this error.
// SkoleIntra.js
import axios from 'axios';

const client = axios.create({});

try {
    const getResponse = await client.get('https://example.m.skoleintra.dk');
    console.log(getResponse.data);
} catch (e) {
    console.error(e.code, e.response?.status, e.response?.statusText);
    console.error(e.response?.headers, e.response?.data);
}
Executing the script:
> node SkoleIntra.js
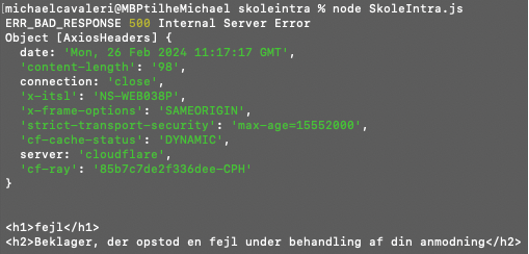
Aha so the error is thrown by Cloudflare. My guess is SkoleIntra has a protection layer implemented against bots and webscraping. This seems like the most likely cause based on the fact that I can access the site with my normal browser without any issues. The next obvious step is to apply some headers to the request and make it appear like a normal browser accessing the URL.
Simplest solution here is to launch the same site on a browser and copy the headers from the GET request that the browser makes. This should fool the server to think we are accessing like a normal human being.
// SkoleIntra.js (The specific cookie details have been stripped out)
import axios from 'axios';

const client = axios.create({
    headers: {
        common: {
            'User-Agent': 'Mozilla/5.0 (Macintosh; Intel Mac OS X 10.15; rv:123.0) Gecko/20100101 Firefox/123.0',
            'Accept': 'text/html,application/xhtml+xml,application/xml;q=0.9,image/avif,image/webp,*/*;q=0.8',
            'Accept-Language': 'da,en-US;q=0.7,en;q=0.3',
            'Accept-Encoding': 'gzip, deflate, br',
            'Connection': 'keep-alive',
            'Cookie': 'Pool=nsiu; SsoSelectedSchool=example.m.skoleintra.dk; UserRole=Parent; Language=Danish; LoggedInForStudents=[...]; messagesUtk=[...]; CsiSsoSessionId=[...]; SsoSessionId=[...]; __RequestVerificationToken=[...]; __cfruid=[...],
            'Upgrade-Insecure-Requests': '1',
            'Sec-Fetch-Dest': 'document',
            'Sec-Fetch-Mode': 'navigate',
            'Sec-Fetch-Site': 'cross-site',
            'Pragma': 'no-cache',
            'Cache-Control': 'no-cache',
            'TE': 'trailers'
        }
    }
});

try {
    const getResponse = await client.get('https://example.m.skoleintra.dk');
    console.log(getResponse.data);
} catch (e) {
    console.error(e.code, e.response?.status, e.response?.statusText);
    console.error(e.response?.headers, e.response?.data);
}
Executing the script
> node SkoleIntra.js
No dice, the protection layer was one step ahead of me.
At this point I experimented with many different headers. Copied from Chrome, Firefox, Safari and as well as a using the headers output from various generators. The result was always the same. I even went as far allowing the script to first access a few other pages and subdomains on the skoleintra.dk base URL, as an experiment to see if we could build a history of trust. However, the intranet page would show the same 500 error regardless of my attempts.
Second approach: Browser automation #
Puppeteer and browser automation
We need a different approach for this. Let’s try and access the page automatically from a real browser instead. Puppeteer is a great tool for this. This package allows us to automate any Chromium based browser via the exposed developer API. For our application, we will look at the Puppeteer-Extra package.
This package wraps support for various plugins on top. Including the Stealth plugin which is a well-maintained package that adds several extra details on the browser fingerprint to make it look like a real user’s browser.
I was filed with premature confidence that this would work, so I went ahead and setup a new empty Typescript project. The goal of the project was to create and export a node module which would get authenticated access to the SkoleIntra platform and subsequently crawl the calendar and the school’s timetable.
The following is a simplified class to showcase the approach. Puppeteer was installed without a new copy of Chrome, and instead pointing to the version already installed. For anyone interested, this can be set by defining a new config file puppeteerrc.cjs before the puppeteer package is installed.
// .puppeteerrc.cjs
module.exports = {
    // Do not download Chrome.
    skipDownload: true,
    executablePath: "/Applications/Google Chrome.app/Contents/MacOS/Google Chrome",
};
// SkoleIntra.ts
import puppeteer from 'puppeteer-extra';
import StealthPlugin from 'puppeteer-extra-plugin-stealth';
import UserAgent from 'user-agents';
class SkoleIntra {
public async authenticate(): Promise<boolean>{
puppeteer.use(StealthPlugin());
let success = false;
let browser?;
let page?;
try {
const browser = await puppeteer.launch({
args: ['--window-size=1920,1080'],
headless: false
});
const page = await browser.newPage();
await page.setUserAgent((new UserAgent()).toString());
await page.goto('https://example.m.skoleintra.dk’);
await page.waitForNetworkIdle();
success = true;
} catch (e) {
console.error("Failed to initialize new browser window", e);
} finally {
await page?.close();
await browser?.close();
}
return success;
}
}Executing the method, launches a new browser instance and navigates to the site. The following screenshot shows the results that was staring back at me from the new tab in Chrome.

Maybe you recall this small piece of HTML from the previous attempts using Axios. This is the output rendered from the 500 internal server that we received earlier. This felt like a major blowback.
Again, I attempted to apply different headers and adjust the fingerprint of my automated browser. Setting different user agents and adjusting various settings but to no avail. The antibot protection saw through all these attempts.
I had all but given up on Puppeteer and was considering to adjust my approach by either working from Python with Selenium or Mechanize as alternatives to the headless browsing. Out of pure curiosity though, I opened my normal browser window, logged into the SkoleIntra site and exported the headers and cookies from my pre-authenticated access into my Puppeteer flow.
Applying these headers - including the set-cookie header - by using the the page.setExtraHTTPHeaders() method, I decided to give it one last run. To my big surprise, I was met with a completely different page.
The site had loaded successfully and applying the cookies gave me authorized access. This refilled me with a bit of renewed hope. The intranet is can certainly be crawled automatically. The only real challenge here is authorization.
Being able to apply the authorized cookies to gain access like this gave me one fallback idea. However, I wanted to try another approach first.
Third approach: The ForældreIntra 2 app #
Analyizing the authentication flow of the available Android App
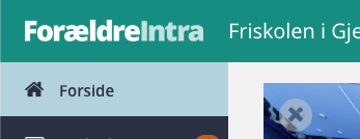
To engage this challenge from a different angle, I wanted to investigate the fact that SkoleIntra also has an Android app called ForældreIntra 2. The app has the same theme and layout as their web application, but I wanted to analyze the authentication flow there to see if there was a way to automate it through this route.
The setup is simple enough. I wanted to run the Android app from an Android emulator (I used a Google Pixel 5 image from the emulator bundled with Android Studio) and setup a MITM proxy to listen for all the traffic. My assumption going into this is that there is almost a guarantee that all traffic is TLS encrypted, so we also need to be able to decrypt all traffic on the emulated device.
For this purpose, I set up an instance of the mitmproxy tools to intercept all data on the smartphone. Mitmproxy is by default configured to run as a https proxy on port 8080. So once the proxy is running from our host device, we can configure the proxy settings on our emulated device. The proxy should be configured with an address matching the gateway on the fake AndroidWifi, and port must match the Mitmproxy details.
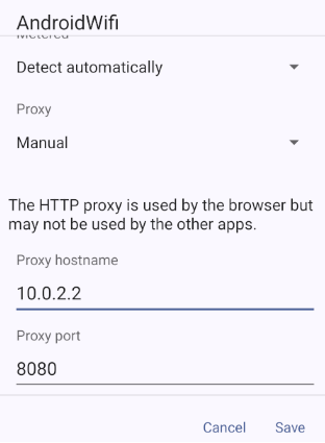
After setting up the proxy, we install the mitmproxy CA certification on this phone to allow sniffing and decrypting the TLS traffic.
The emulator does not have any Google Play access, so I was unable to fetch the app directly from the Play Store. I found a sketchy APK of the Forældreintra 2 app from APKPure that could be downloaded and installed on the emulator. The app might have been riddled with malware, but I am running the emulator in a contained environment. Serves my purpose for the sake of this test.
Installing and launching the app worked wonderfully. The app instantly pinged Firebase at https://console.cloud.google.com/marketplace/product/google/firebaseinstallations.googleapis.com and the response covered 2 important details that gave me hope for this approach.
- The TLS response was successfully decrypted.
- The response included an auth token for the firebase authentication.
I took a note of the auth token as well as the refresh token, in case I needed to forge a request manually later.
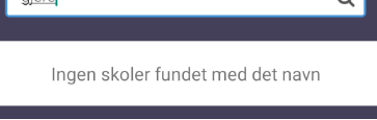
The first screen on the app requires the user to select which school they want to authenticate against.
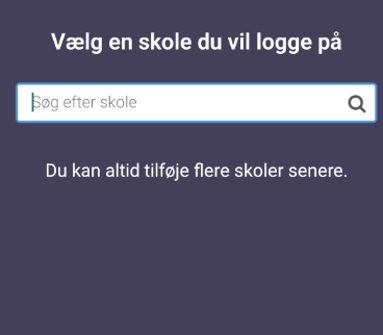
I started typing out the name of our target school and was met with an unfortunate message: No school with that name was found
Looking through the mitmproxy logs, I identified multiple errors had been thrown.
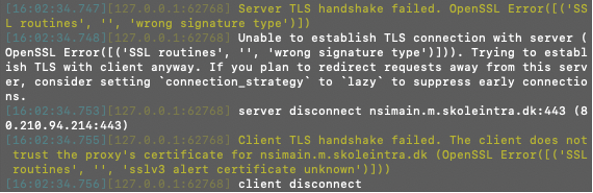
Digging into this rabbit hole revealed the fact that the bot protection was again one step ahead of us. This conclusion was drawn based on two pointers.
First, we can identify that selecting a school will post requests to the nsimain.m.skoleintra.dk domain. Which we know from earlier has Cloudflare protection all down to the root of skoleintra.dk.
Secondly, we can identify that it will block all traffic that has been intercepted and manipulated by the MITMProxy. Intercepting the packages changes their fingerprints due to the fact we installed the previous certificates our own proxy server that we now route all traffic through. This means the approach must have been identified and blocked on the Cloudflare server.
I confirmed this by swiftly disabling the proxy on the android device, re-opening the app and typing out the school name. It instantly appeared on the screen as a selectable option.
Digging even deeper into this, I came across an interesting approach. One implementation of this approach is offered by the Mirror-Proxy tool here: https://github.com/fedosgad/mirror_proxy.
Quoting the readme:
This tool is written to address these problems using awesome utls library. For software under test (SUT) it looks like a usual HTTP proxy. When SUT connects through it, ClientHello is fingerprinted and upstream connection with the same fingerprint is established. Data inside TLS tunnel are not modified so higher-level fingerprints (like HTTP/2 fingerprint from Akamai) are also preserved. Both client and upstream connections` TLS keys are logged so tools like Wireshark can be used to record and inspect traffic passively.
--------------           ---------------           --------------          --------------
|  Software  |           |   Mirror    |           |  Upstream  |          |   Remote   |
|   under    |<----+---->|   proxy     |<----+---->|   proxy    |<-------->|   Server   |
|   test     |     |     | (this tool) |     |     | (optional) |          |            |
--------------     |     ---------------     |     --------------          --------------
                   |           |             |
       +-----------+-----------)-------------+
       |                       |
       v                       v
--------------           ---------------
|  Sniffer   |           |   TLS key   |
| (Wireshark)|<----------|    log      |
|            |           |    file     |
--------------           ---------------
This is just the tool we need to avoid the problem with the second point.
However, due to the first point - and the fact that the app also sends requests to the same base domains protected by cloudflare - I decided against moving further down this rabbit hole. Even if I would be able to trace the full authentication flow on the app, reproducing this automatically would presumably have me face the same challenges as automating the authentication flow on the web app. If anything, disregarding the android app at this stage and analysing the normal website traffic would make more sense.
The unfeasible option: Android automation #
Reviewing the Puppeteer alternative for Android
This bit is more of a side note that was never explored. Similar to the approach of running a headless browser to automate the authentication flow inside an actual browser and mimic the real users behaviour, one alternative would be to do the same on the android application.
It would be possible to launch the same ForældreIntra 2 app on an Android emulator such as Genymotion and automate the touch gestures to crawl through the whole authentication flow.
However, this approach was not really feasible based in the fact that this analysis was supposed to be concluded with a script for running in the background on a Raspberry Pi device while also powering the rest of our smarthome dashboard.
Fourth approach: Browser extension hooks #
Creating our own authentication flow
The fourth approach builds on what was learned from the second attempt: Applying the cookies that are set during a "normal" visit to the Skoleintra platform to an automated page load gives full access to the site without blocking.
So I went for what seems like the most simple option: Mimicking the Google oAuth authentication flow.
The design is fairly simple. Prepare a user flow similar to what we currently use to authenticate a Google account. Meaning, add a button on the settings page which opens the login page in a new window, require the user to login using their Skoleintra credentials and redirect them to a confirmation page before navigating back to the dashboard.
We don't have any control over how the Skoleintra pages behave. However, since the dashboard is running from a Chromium instance, we can add a plugin and take some control over the browser behaviour.
So that's exactly what I did! I prepared a very simple Chromium extension that activates whenever a Skoleintra page is loaded. The extension will be active only on pages that require authenticated access on Skoleintra, and once active it will capture the cookies and forward them to our Dashboard server for further processing.
The extension consists of 3 files:
manifest.json
{
  "manifest_version": 3,
  "name": "Skoleintra Auth Injector",
  "version": "1.0",
  "description": "Inject script to capture skoleintra authentication data",
  "permissions": ["webNavigation", "activeTab", "storage"],
  "background": {
    "service_worker": "background.js"
  },
  "content_scripts": [
    {
      "matches": ["https://example.m.skoleintra.dk/parent/*"],
      "js": ["content.js"]
    }
  ]
}
content.js
const cookieData = document.cookie;
chrome.runtime.sendMessage({ action: "sendData", cookieData });background.js.
chrome.runtime.onMessage.addListener((request, sender, sendResponse) => {
    if (request.action === "sendData") {
        sendDataToServer(request.cookieData);
    }
});

function sendDataToServer(cookieData) {
    fetch("http://localhost:3001/authorize-skoleintra", {
        method: "POST",
        body: JSON.stringify({ cookieData }),
    })
    .then(response => {
        // Navigate to confirmation page
    })
    .catch(error => console.error("Error sending data to server:", error));
}
The solution here was suitable for our very specific use case. We need only to authenticate in the context of scraping the calendar data and add to our dashboard. In general, this user flow is not optimal but it is barely different from the flows we already have and I can certainly live with this.
The cookies that are obtained from accessing the page "normally" are parsed and then applied in the dashboard using my Skoleintra NPM module.